
This text offers comprehensive guidance on faucet repair, addressing common issues like leaks caused by worn O-rings, cartridge failures, or broken parts. It distinguishes between internal and external leak types, emphasizing the importance of accurate identification for effective troubleshooting. The content covers:
Causes & Types: Understanding leak sources, from loose fittings to faulty mechanisms or corroded valves.
Troubleshooting: Steps like visual inspection, shutting off water supply (via main shut-off valve), and basic part replacement for minor leaks.
Tools & Materials: Essentials like wrenches, pliers, thread seal tape, and new washers/O-rings.
Safety First: Emphasis on shutting off the water before starting repairs and avoiding damage during disassembly.
Step-by-Step Guide: Detailed instructions for replacing washers and O-rings.
Prevention & Maintenance: Regular inspections, tightening loose parts, lubricating moving parts, and cleaning aerators to avoid leaks.
* When to Call a Pro: Recognizing complex issues requiring professional plumbers for advanced diagnostics and repairs (persistent leaks, water wastage, unusual sounds).
Tired of that persistent drip-drip-drip? Don’t worry, you’re not alone. Faucet leaks are among the most common household issues, but identifying and repairing them doesn’t have to be daunting. This comprehensive guide dives into everything you need to know about faucet repair, from understanding common causes and types of leaks to step-by-step troubleshooting and prevention tips. We’ll walk you through the process, tools required, and even when it’s best to call a professional plumber for assistance.
Understanding Faucet Leaks: Common Causes and Types

Faucet leaks are a common household issue that can range from a minor inconvenience to a significant waste of water and money. Understanding the causes and types of leaks is the first step in effective faucet repair. The most prevalent reasons for faucet leaks include worn-out or damaged O-rings, cartridge failures, and broken or misaligned parts.
There are two primary types of faucet leaks: internal and external. Internal leaks originate from the faucet’s mechanism, often due to faulty cartridges or corroded parts within the valve. External leaks, on the other hand, occur at the connection points between the faucet and the pipes, typically because of loose fittings or damaged seals. Recognizing these differences is crucial for selecting the right repair approach.
Step-by-Step Process for Identifying Leak Sources
Identifying the source of a leak is the first step in any faucet repair. Start by observing the bathroom or kitchen area where the leak is occurring. Check for any visible signs of damage, such as moisture buildup or water stains on walls, floors, or countertops. Next, turn off the water supply to the faucet; this can typically be done by locating and shutting off the nearby shut-off valves. After turning off the water, inspect the faucet itself. Look for any loose connections, particularly around the handle and spout areas.
Wipe down the faucet with a dry cloth to ensure there are no residual water droplets hiding potential leak points. Check the O-rings and seals; these are common areas where leaks originate. If you notice any damage or wear and tear, replacing these parts may stop the leak. If the issue persists, consider further investigation, as the leak could be coming from the pipes beneath the sink or even the water lines leading to the faucet.
Tools and Materials Required for Repair
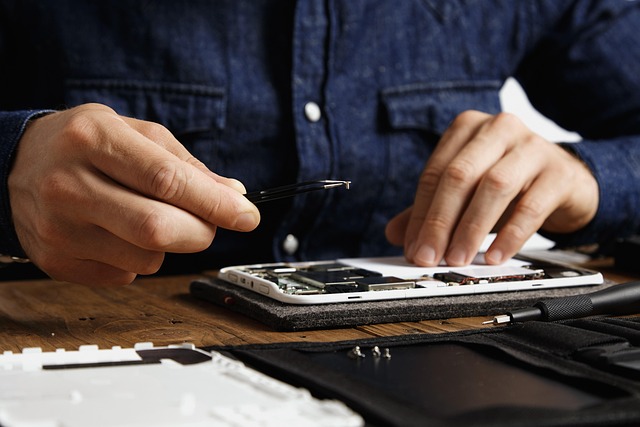
When it comes to tackling a faucet leak, having the right tools and materials is essential for a successful repair. For most standard faucet leaks, you’ll need only a few basic items from your household or local hardware store. This typically includes wrenches (both adjustable and pipe), pliers, a new washer or O-ring (depending on the type of faucet), and thread seal tape.
The specific tools required may vary slightly based on the faucet’s design – for instance, an older model might need a specific type of washer while a newer one could require a different kind of repair part. Always check your faucet’s manual or consult a professional if you’re unsure about disassembly procedures to avoid damaging the components.
How to Turn Off the Water Supply Before Repair

Before tackling any faucet repair, shutting off the water supply is a crucial first step to prevent leaks and potential flooding. The main shut-off valve is typically located under the sink or in your home’s utility area. It usually has a handle that can be turned clockwise to close the valve. Identify this valve before any issue arises, so you can quickly turn it off in case of an emergency or while repairing the faucet.
Once you’ve located and closed the main shut-off valve, confirm there’s no water flowing by turning on the faucet. If water doesn’t emerge, you’re ready to proceed with your repair. This simple step ensures that any work you do is safe and controlled, preventing unexpected water damage during the faucet repair process.
Detailed Guide: Replacing Faucet Washers and O-Rings
When it comes to faucet repair, replacing washers and O-rings is one of the most common tasks for homeowners. This simple yet effective method can stop leaks and restore your faucet’s functionality. Start by turning off the water supply under the sink using the shut-off valves located behind or beneath the faucet. Next, remove the faucet handle to access the internal components. You’ll find washers and O-rings that seal around the spout and control the flow of water. Inspect these parts for any damage or wear; they may need replacing if the leak is persistent.
Obtain replacement washers and O-rings that are specifically designed for your faucet model, as using the wrong size or type can lead to further issues. Carefully lift out the old parts, clean the surfaces, and install the new washers and O-rings, ensuring a tight fit. Reassemble the faucet handle and turn on the water supply. Test the repair by turning on the faucet and checking for any leaks at the joints where the washers and O-rings are located. This detailed guide can help you tackle minor faucet repair jobs efficiently.
Troubleshooting Tips for Various Faucet Leak Scenarios

When faced with a leaky faucet, the first step in troubleshooting is identifying the source of the leak. Common scenarios include leaks at the base of the faucet handle, where the spout meets the valve, or from the connections under the sink. For base-handle leaks, check for loose screws or seals; tightening them may stop the leak. If the damage is more severe, replacing these parts might be necessary.
In cases of leaks at the spout connection, inspect the O-ring or washer for wear and tear. These components are often the culprit in such leaks, and replacing them is usually an effective solution. For complex issues, involving multiple leaks or persistent problems after trying basic repairs, it’s advisable to consult a professional plumber. Prompt action on faucet leaks not only saves water but also prevents potential damage caused by continuous dripping.
Preventive Measures: Maintaining Your Faucets to Avoid Leaks

Regular maintenance is key to preventing faucet leaks and ensuring longevity. Start by inspecting your faucets regularly for any signs of damage or wear, especially around the seals and gaskets. Tighten any loose parts and replace worn-out components as soon as possible. Lubricating the faucet’s moving parts with a silicone-based lubricant can also help maintain its functionality.
Additionally, consider using foam or rubber washers in place of cotton ones, as they offer better sealing and are less prone to degradation over time. Regular cleaning of the faucet’s aerator can prevent mineral buildup, which may lead to reduced water flow and potential leaks. Taking these preventive measures will significantly reduce the need for costly faucet repair and maintain your home’s plumbing system in optimal condition.
Common Mistakes to Avoid During Faucet Repair

When tackling a faucet repair, it’s easy to make mistakes that can prolong the process or even cause further damage. One common blunder is not identifying the exact source of the leak before attempting any fix. Every faucet has unique components, and understanding the specific issue requires careful observation. Instead of rushing into replacing parts, take time to pinpoint where the water is escaping—is it at the base, handle, or spout?
Another frequent error is using the wrong tools or not having the necessary ones. Improper tools can lead to stripped threads or damaged parts. Ensure you have a good set of adjustable wrenches and pliers before beginning. Additionally, over-tightening can be hazardous; it might deform parts or even break connections. Always tighten fittings gently but firmly, especially when dealing with small components.
When to Call a Professional Plumber for Faucet Leaks

A small, seemingly harmless faucet leak might not seem like an emergency, but it’s important to address it promptly to avoid bigger problems down the line. While some basic faucet repair tasks can be tackled by homeowners, there are instances where calling a professional plumber is crucial. Leaks that persist despite your attempts to tighten or replace the faucet parts, or those that result in significant water wastage, require expert intervention.
Professional plumbers possess the specialized tools and knowledge to diagnose complex issues, such as leaks caused by worn-out valves or hidden pipe damage. They can also ensure that any repairs are done efficiently and effectively, preventing further complications. If you notice a persistent drip, an unusual sound coming from the faucet, or if your water bills have unexpectedly soared, it’s time to call in a plumber for expert faucet repair.