
This text offers a comprehensive guide to commercial faucet maintenance and repair. It highlights common issues like leaks, dripping, and irregular water flow caused by worn parts, clogged aerators, or corrosion. Regular maintenance, including tightening connections, cleaning aerators, and prompt action on minor problems, is emphasized as crucial for preventing costly repairs. The guide recommends equipping a toolkit with essential tools and supplies for successful repairs tailored to specific faucet types. It provides step-by-step instructions for fixing leaks, emphasizing the simplicity and cost-effectiveness of replacing O-rings or washer cartridges. Additionally, it covers adjusting water pressure and temperature settings, as well as the importance of regular inspections, leak checks, corrosion prevention, and cleaning for long-term faucet functionality.
“Looking to tackle a common commercial faucet repair? This comprehensive guide breaks down the process step-by-step, from diagnosing leaks and dripping to replacing cartridges and adjusting water pressure. We equip you with the essential tools, materials, and knowledge to efficiently address various faucet issues, ensuring your commercial space maintains reliable and efficient plumbing. Discover expert tips for maintenance, too, and extend the lifespan of your fixtures.”
Understanding Common Faucet Issues and Their Causes
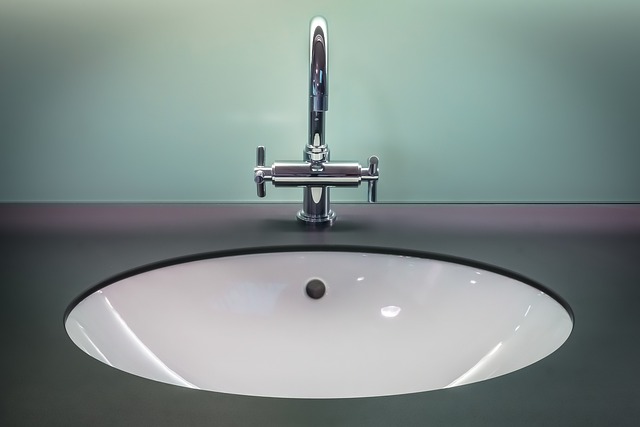
Faucets are an integral part of any commercial kitchen or bathroom, and their smooth operation is essential for hygiene and efficiency. However, like any mechanical device, they can develop issues over time. Understanding common faucet problems and their root causes is the first step in effective faucet repair.
Leaking, dripping, and irregular water flow are frequent complaints. Causes may include worn-out O-rings or washers, clogged aerators, or even damaged valve seats. Corrosion, especially in older models, can also lead to these issues. Regular maintenance, such as tightening connections and cleaning aerators, can often prevent or delay these problems. Prompt action on minor issues is key to avoiding more complex and costly faucet repair down the line.
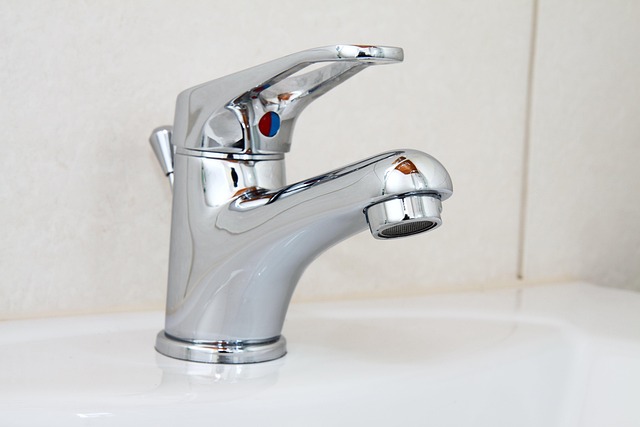
Tools and Materials Required for Faucet Repair
When tackling a commercial faucet repair, having the right tools and materials is paramount for success. For most standard repairs, you’ll need a few basic tools including adjustable wrenches for gripping and turning components, pliers for grasping and bending metal, and a set of screwdrivers (both flathead and Phillips) to match the screws on your faucet. Additionally, a replacement cartridge or O-rings are often required, so ensure you have these specific parts readily available.
The materials needed may vary slightly depending on the type of faucet you’re repairing, but generally, you’ll require pipe tape for sealing connections, a solvent (like mineral spirits) to clean surfaces, and possibly some plumber’s putty for creating watertight seals. Having these tools and materials at hand will ensure your faucet repair is swift, efficient, and effective.
Step-by-Step Guide to Fixing a Leaking Faucet

Fixing a leaking faucet is an easy DIY task that can save you money and reduce water wastage. Here’s a step-by-step guide to tackle this common household problem:
1. Turn Off the Water Supply: Before you begin, make sure to close the shut-off valves under the sink to cut off the water flow. Test if the faucet is indeed dry by turning it on. This safety measure prevents any accidents during repair and ensures a clean workspace.
2. Disassemble the Faucet: Gather the necessary tools – a wrench or pliers – and carefully remove the faucet handle and aerator. Next, unscrew and detach the supply lines from the faucet base. With these simple steps, you’ll gain access to the internal parts responsible for the leak.
3. Identify the Source of Leakage: Inspect the cartridge or washer inside the faucet. Over time, these components can wear out, causing leaks. A common culprit is a damaged washer or a faulty O-ring. Compare your findings with the manufacturer’s instructions or an online guide to select the right replacement parts for your specific model.
4. Replace Worn-Out Parts: Once identified, replace the defective washer or O-ring with new ones from a hardware store. Ensure you get the exact match for your faucet model. Follow the instructions provided with the repair kit or consult a professional if needed.
5. Reassemble and Test: After installing the new parts, carefully put back together the disassembled components, making sure everything is securely fastened. Turn on the shut-off valves and test the faucet to ensure it’s fully functional and no longer leaking.
Troubleshooting Faucet Dripping Problems
When faced with a dripping faucet, many homeowners opt for a quick fix or a temporary solution instead of delving into the actual repair process. However, addressing a leaky faucet is usually a straightforward task that can save you money in the long run. The first step is to Faucet Repair the most common culprits: loose or damaged O-rings or washer cartridges. These parts are relatively inexpensive and easy to replace, making it a simple DIY project for even the most inexperienced users.
To begin troubleshooting, turn off the water supply valves located under the sink before disassembling the faucet. This prevents any water from spilling out during the repair process. Once the parts are accessible, inspect them for wear and tear. If the O-rings or washer cartridges appear damaged or worn, they should be replaced immediately. This simple Faucet Repair can stop the dripping and restore your faucet to its original condition, ensuring a leak-free experience for years to come.
Replacing Faucet Cartridges and Washers
When it comes to basic faucet repair, replacing cartridges and washers is often a quick and straightforward process. These components are responsible for controlling water flow and temperature in your faucet, so if they fail or become damaged, it can result in leaks or an inability to shut off the water supply. Many modern faucets use replaceable cartridges that allow for easy troubleshooting. You’ll typically find these beneath the faucet handle or at the base of the spout.
The process involves turning off the water supply, removing any decorative covers or caps, and unscrewing the cartridge from its housing. A new cartridge can then be installed by screwing it in firmly but carefully, ensuring it’s secure. Washers, which are usually located beneath the cartridge, may also need replacement if they’re worn out or damaged. This involves simply removing them and inserting new ones to achieve a watertight seal.
How to Adjust Water Pressure and Temperature Settings
When it comes to commercial faucet repair, adjusting water pressure and temperature settings is often a straightforward process. Start by locating the control valves under the sink or behind the faucet. These valves regulate both the hot and cold water supply. To adjust the pressure, turn the valve clockwise to increase pressure or counterclockwise to decrease it. For temperature, use the knobs on the valve to set your desired warmth, ensuring a comfortable and safe flow for users.
Remember, consistent maintenance is key to preventing future issues with commercial faucets. Regularly check these settings during repairs to ensure they remain optimal. This simple step can significantly enhance user experience, especially in high-traffic areas where water pressure and temperature can impact customer satisfaction.
Tips for Maintaining Your Commercial Faucets

Regular maintenance is key to keeping commercial faucets in top condition and preventing costly repairs. Start by scheduling routine inspections, checking for any leaks or signs of corrosion around the base and spout. Cleaning the faucet heads with a mild detergent and soft cloth can also help maintain their performance and extend their lifespan.
Additionally, consider using water-efficient aerators to reduce water flow without compromising pressure, which not only saves on utility bills but also contributes to environmental conservation. Remember, addressing small issues early on can save you from bigger, more expensive faucet repair jobs down the line.