
This text offers a comprehensive guide to faucet repair, emphasizing identifying and addressing common issues like worn-out washers, O-rings, or faulty cartridges. Basic troubleshooting, regular maintenance (including tightening connections and replacing parts), using the correct tools and materials (available at home improvement stores), and DIY hacks (like plumber's tape for tighter seals) are key to affordable repairs. For complex issues or persistent leaks, professional plumbers are recommended. Regular monthly checks and cleaning further prevent leaks and prolong faucet life.
Tired of that pesky leaky faucet? Don’t worry, fixing it doesn’t have to break the bank. This guide breaks down affordable solutions for common faucet issues, from quick DIY hacks to step-by-step repairs. We’ll walk you through identifying the leaky part – cartridge, washer, or O-ring – and provide simple fixes for each. Learn preventive measures, regular maintenance tips, and when it’s time to call a plumber for complex repairs. Get ready to turn that drip into a leak-free oasis!
Understanding Common Faucet Issues
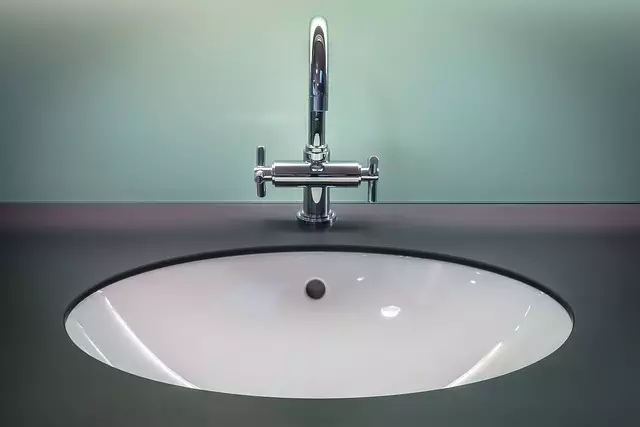
Many leaky faucets are caused by issues at the base, where the faucet connects to the sink or countertop. The most common problem is a worn-out washer or O-ring inside the faucet’s valve mechanism. These parts can degrade over time due to constant use and exposure to water pressure, leading to leaks. Another frequent issue is a faulty cartridge, which controls the flow of water and can develop cracks or become disconnected from the stem.
When addressing leaky faucets, it’s important to identify the specific problem area. Visual inspection and some basic troubleshooting can help homeowners pinpoint the culprit. Regular maintenance, such as tightening connections and replacing worn parts, is often all that’s needed for an affordable fix. Many supplies required for faucet repair are readily available at home improvement stores, making it a straightforward DIY project for most people.
Gather the Necessary Tools and Materials
Before tackling any leaky faucet repair, it’s crucial to gather the right tools and materials. For most faucet leaks, you’ll need a wrench or pliers for removing parts, a new O-ring or washer, and sometimes a replacement faucet stem. These items are readily available at home improvement stores, making the fix affordable even on a tight budget.
Having the correct tools makes the repair process smoother and more efficient. A standard adjustable wrench or pipe wrench will help you loosen and remove any nuts or bolts securing the faucet parts. Additionally, rubber gaskets or O-rings are common culprits for leaks; ensuring you have new ones in the right size is essential for a successful faucet repair, saving you from further headaches caused by persistent leaks.
Identifying the Leaky Part: Cartridge, Washer, or O-Ring?
When it comes to leaky faucets, pinpointing the culprit is half the battle won in any effective faucet repair. The good news is that most leaks stem from three common parts: the cartridge, washer, or O-ring. Start by examining these components visually. Often, a simple look will reveal a damaged or worn-out part. For instance, if you notice a small, circular gasket or washer that appears frayed or distorted, it’s likely the culprit behind your leaky faucet.
The cartridge controls the water flow and pressure in your faucet, while O-rings create a watertight seal between various parts. If the leak is coming from the base of the faucet or under the handle, it could be an issue with the cartridge. Conversely, if you see water dripping around the neck of the faucet where the spout meets the base, chances are the washer or O-ring needs attention.
Step-by-Step Fix for Each Component

Leaky faucets can be a common household issue, but fixing them doesn’t always have to break the bank. Here’s a step-by-step guide for each component to help you tackle the problem effectively and affordably. Start by turning off the water supply valves located under the sink to prevent any unnecessary wastage while you work. Next, remove the faucet handle and inspect the washer or O-ring for damage or wear. These are often the primary culprits of leaks. Simply replacing them can seal the deal and stop the leak. If the problem persists, check the cartridge or valve stem. Over time, these parts can become contaminated with mineral deposits, leading to leaks. Cleaning or replacing them is a straightforward process that many DIY enthusiasts can handle. With these simple fixes, you’ll be well on your way to saving money and reducing water wastage caused by leaky faucets.
Simple DIY Hacks for Temporary Fixes

Leaky faucets can be a common household frustration, but before calling a plumber, consider trying some simple DIY hacks for temporary fixes. One of the most effective and affordable solutions is checking and tightening the faucet’s O-ring or washer, which often causes leaks. This quick fix involves shutting off the water supply, disassembling the faucet, replacing the worn-out part, and reassembling it tightly. Another hack is using a rubber washcloth or a small piece of foam to create a temporary seal around the leak until you can acquire a proper replacement part.
For more complex leaks, consider using plumber’s tape or a small piece of teflon tape to cover the threads where the faucet connects to the water lines. This can help create a tighter seal and stop the leakage temporarily while you source a longer-term solution or wait for a plumber to arrive. These simple DIY hacks are not only cost-effective but also empower you to take control of your home’s maintenance, saving time and potentially money in the long run.
When to Call a Plumber: Complex Faucet Repairs

If you’ve attempted basic faucet repair techniques and found them ineffective, or if your leaky faucet issue involves complex components like aerators, cartridge systems, or pressure balancing mechanisms, it might be time to call in a professional plumber. While some faucet repairs can be DIY-friendly and cost-effective, more intricate problems often require specialized tools and knowledge.
Plumbers are equipped to handle these challenges, ensuring your faucet is repaired properly and efficiently. They can diagnose issues swiftly, recommend the best course of action, and provide long-lasting solutions. Remember, timely intervention on complex faucet repairs can prevent further damage and costly replacements down the line.
Preventive Measures and Regular Maintenance Tips

Regular maintenance is key in preventing leaky faucets from becoming a bigger problem and leading to costly repairs. Start by checking your fixtures at least once a month for any signs of leaks or drips. These can often be easily fixed with simple parts like O-rings, washers, or cartridges—common faucet repair components that are inexpensive and readily available.
To further protect against leaks, consider using plumbing tape or pipe sealants around the sink’s drainage area to create a tight seal. Additionally, keep an eye on the faucet’s finish; regular cleaning with mild detergent and a soft cloth can help maintain its gloss and prevent mineral buildup, which could lead to future issues.