Faucet issues like leaks and low pressure are common, requiring professional repair for swift resolution. Skilled plumbers diagnose problems caused by worn parts or mineral buildup, offering effective cleaning or repairs. Prompt action saves water and money, while neglecting leaks can lead to high bills. Professionals use specialized tools and techniques, while homeowners can handle basic issues with knowledge and simple steps. Regular maintenance, including inspections and descaling, prevents future problems. DIY repair requires caution, accurate identification of issues, and proper safety gear to avoid complications. Choosing a licensed, experienced plumber ensures quality work and customer satisfaction.
Professional faucet services are essential in maintaining a well-functioning and efficient plumbing system. This article delves into the various aspects of faucet repair, from understanding common issues like leaks and clogs to choosing the right plumber for your needs. We explore crucial tools and techniques, provide step-by-step guides for replacement parts, and offer maintenance tips to prevent future problems. Remember that prompt repair is vital to avoid pesky water waste and costly damage, making this a go-to guide for all your faucet repair needs.
Understanding Common Faucet Issues
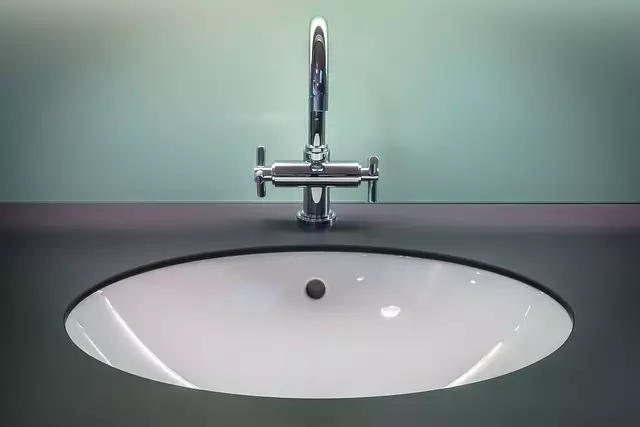
Many common faucet issues can arise in any home or commercial setting, requiring professional faucet services for effective repair. Leaks are one of the most frequent problems, often caused by worn-out O-rings or damaged washers inside the faucet. This simple fix, known as faucet repair, can prevent excessive water wastage and significantly lower water bills.
Another prevalent issue is low water pressure, which can be attributed to mineral buildup or a faulty aerator. Professional plumbers are equipped with the knowledge and tools to address these issues promptly. By identifying the root cause—whether it’s a simple cleaning or a complex repair—they ensure that faucets operate efficiently, providing optimal water flow and temperature control for every user.
The Importance of Prompt Repair

Prompt repair of leaky or malfunctioning faucets is crucial for several reasons. Not only does it save water, but it also prevents unnecessary expense on your water bill. Moreover, a quick fix can prevent further damage to the faucet and the surrounding areas, such as countertops or sinks. Neglecting a leaky faucet can result in significant waste over time, with some estimates suggesting that a single drop per second adds up to hundreds of gallons wasted annually.
In the world of professional faucet services, responsiveness is key. Plumbing issues, especially leaks, don’t always occur during convenient hours. A reliable service provider should offer 24/7 emergency repair options to address these problems promptly. Additionally, efficient repairs can ensure your home or commercial space remains in good condition, maintaining a clean and safe environment for everyone.
Tools and Techniques for Faucet Services

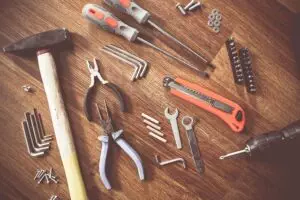
In the realm of faucet services, professionals rely on a diverse set of tools and techniques to address various issues, from simple leaks to complex replacements. Essential tools for faucet repair include adjustable wrenches for tightening or removing components, pliers for gripping tight parts, and screwdrivers compatible with different head types—flat, Phillips, or Torx. Additionally, specialized tools like faucet disassembly kits and O-ring extruders facilitate precise repairs, ensuring a thorough fix that prevents future leaks.
Techniques employed in faucet services vary based on the problem. Common methods include replacing worn-out parts like O-rings and cartridges, adjusting water pressure regulators, and tightening or replacing faulty connections. For more intricate repairs, professionals may need to disassemble the entire faucet, meticulously identifying and rectifying issues within its components. These meticulous approaches not only resolve immediate problems but also extend the lifespan of faucets, saving folks from frequent replacements.
Troubleshooting Leaks and Clogs

Many homeowners face the common issues of leaks and clogs in their faucets, but with a bit of knowledge, these problems can be easily tackled. For minor leaks, checking the connections is often the first step. Tighten any loose parts, including the faucet handle, supply lines, and aerator. This simple fix can prevent unnecessary water waste and extend the lifespan of your faucet.
When dealing with clogs, a good starting point is to remove the aerator and clean it thoroughly. Debris like mineral deposits or sediment buildup can cause clogging. If the problem persists, try using a plunger or a drain snake. For stubborn cases, it might be time to call in a professional faucet repair service, ensuring your faucets are back in top working condition without causing further inconvenience.
Replacing Faucet Parts: A Step-by-Step Guide

When it comes to faucet repair, replacing faucet parts is a common task for both professionals and DIY enthusiasts. The process can range from simple to complex, depending on the type of faucet and the specific part needing replacement. Here’s a step-by-step guide to help you navigate this common faucet repair scenario:
1. Identify the Issue: Start by pinpointing exactly what’s wrong with your faucet. Is it leaking? Not shutting off properly? Once identified, determine the faulty component—be it the cartridge, washer, or valve seat—and source a replacement that fits your faucet model. Always check for compatibility before purchasing parts.
2. Gather Tools: Basic tools like adjustable pliers, channel lock pliers, and a screwdriver should suffice for most faucet repair jobs. Depending on your faucet’s design, you might also need an adjustment tool or a special wrench. Gather all necessary tools and ensure a clear workspace before beginning.
3. Turn Off the Water Supply: Before any disassembly, shut off the water supply to prevent leaks or flooding. Locate the shut-off valves under the sink or behind the faucet, and twist them clockwise to turn off the water. Test each valve separately after turning them off to ensure they’re fully closed.
4. Dismantle the Faucet: Depending on your faucet model, you’ll need to remove different components. Start by unscrewing any decorative covers or caps. Then, locate and remove the handle, followed by the cartridge (if applicable). Be sure to note how each part is oriented for proper reassembly later.
5. Replace the Part: With the old part removed, install the new replacement. Follow the manufacturer’s instructions for specific steps. Most cartridges have a simple slide-in design. Washers and valve seats may require tightening with pliers or a special tool. Ensure all parts are seated correctly and securely fastened.
6. Reassemble the Faucet: Once the new part is in place, carefully reassemble the faucet according to the original sequence of disassembly. Tighten connections gently but firmly, ensuring nothing leaks at any joint. Test the handle’s operation, and adjust if necessary, before turning on the water supply.
Choosing the Right Plumber for Your Needs

When it comes to faucet repair or maintenance, selecting the ideal plumber is key to ensuring a job well done and long-lasting results. With numerous plumbing services available, understanding your specific requirements is essential. Look for a professional who specialises in faucet repairs; they should have the necessary tools and expertise to tackle various issues, from leaky faucets to complex fixture replacements.
Reputation matters; seek recommendations from friends or neighbours for reliable plumbers with a proven track record. Check online reviews and licences to verify their credentials. The right plumber will offer tailored solutions, provide upfront pricing, and ensure your satisfaction through quality work and after-sales support.
Maintenance Tips to Prevent Future Problems

Regular maintenance is key to preventing future faucet issues. Start by inspecting your faucets for any signs of damage or leaks on a monthly basis. Addressing these problems early can save you from costly repairs down the line. Simple steps like tightening loose connections, replacing worn-out O-rings or gaskets, and lubricating valves can go a long way in maintaining their functionality.
Additionally, descaling your faucets periodically is essential, especially if your water contains high mineral content. Buildup of limescale can lead to reduced water flow and even damage the faucet’s internal components. Using vinegar or specialized cleaning solutions can help remove this buildup, ensuring smooth operation and extending the lifespan of your faucet repair.
Common Mistakes to Avoid During Faucet Repair

When tackling faucet repair yourself, it’s easy to make mistakes that can lead to further damage or inefficient fixes. One common error is not identifying the exact issue before replacing parts. Each faucet problem could be a result of various factors—from loose connections and worn-out seals to clogged aerators or even plumbing system complications. Rushing into repairs without a thorough diagnosis may mean wasting money on unnecessary replacements.
Another blunder is not using the right tools or not following safety protocols. Faucet repair often requires specific tools like adjustable wrenches, pliers, and replacement parts tailored to the faucet’s make and model. Inadequate tools can make the process challenging and increase the risk of injury. Always ensure you have the correct tools and wear protective gear, such as gloves, to avoid accidents.